Running web applications on containers in the cloud is a breeze with Kool.dev Cloud. Easily move any Docker Compose based environments to our managed cloud powered by Kubernetes (AWS EKS).
TL;DR: kool is a free, open-source CLI tool that makes local development with Docker a breeze. Now it also helps you deploy Docker Compose based applications to the cloud with the Developer Experience developers have always wished for - meet Kool.dev Cloud.
Our goal is to be the compass and a lighthouse for developers to navigate nowadays containers troubled waters, from leveraging container technology for local development, and then moving that same environment to the cloud - without the steep learning curves each usually comes with.
Let's explore how Kool.dev delivers on its promise to offer a great Developer Experience for managing and deploying applications running in containers to the cloud.
¶Kool.dev Cloud Quickstart
Once you register and confirm your email on Kool.dev Cloud you will be presented the welcome dashboard on our platform:
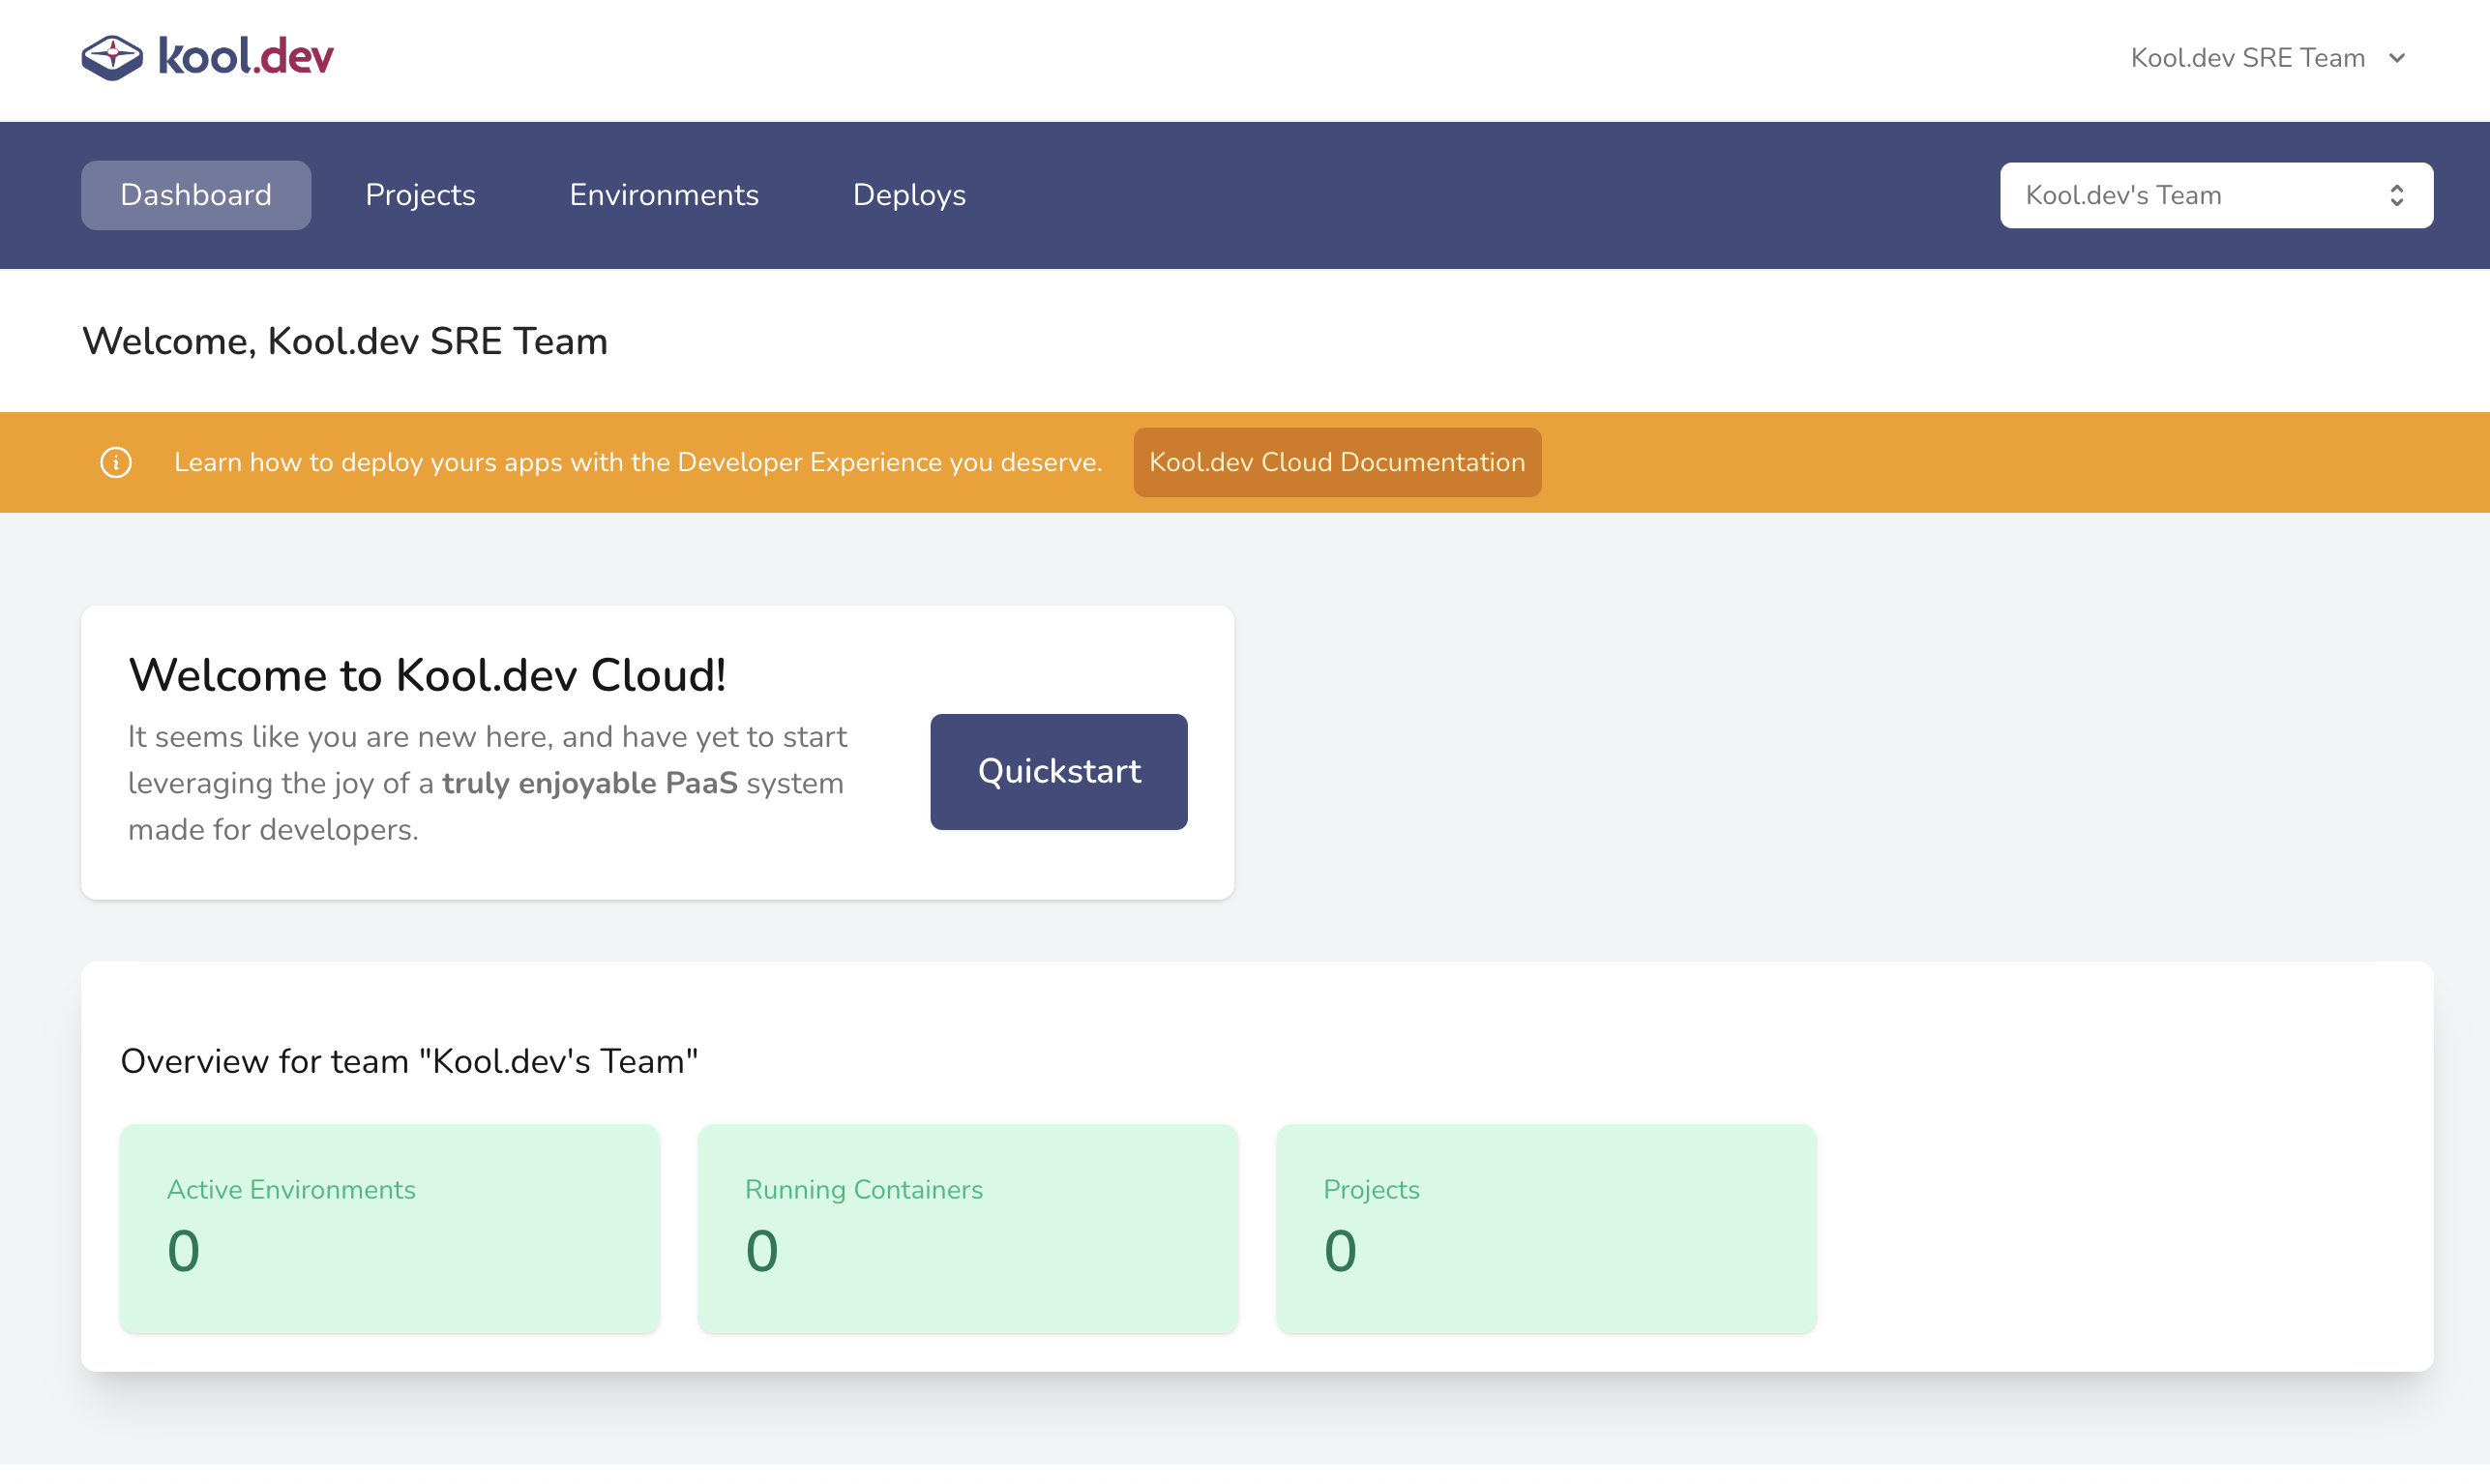
As first timers, let’s use the Quickstart option in front of us to walk through the few required steps.
¶Create a new Project and get an Access Token
A Project is a grouping entity for one or more environments. Let's create our Tutorials project.

One of the important roles of a project other than grouping your environments, it's to offer the CLI access via Access Tokens to all environments on that project, and that is our very next step: generate a new access token.

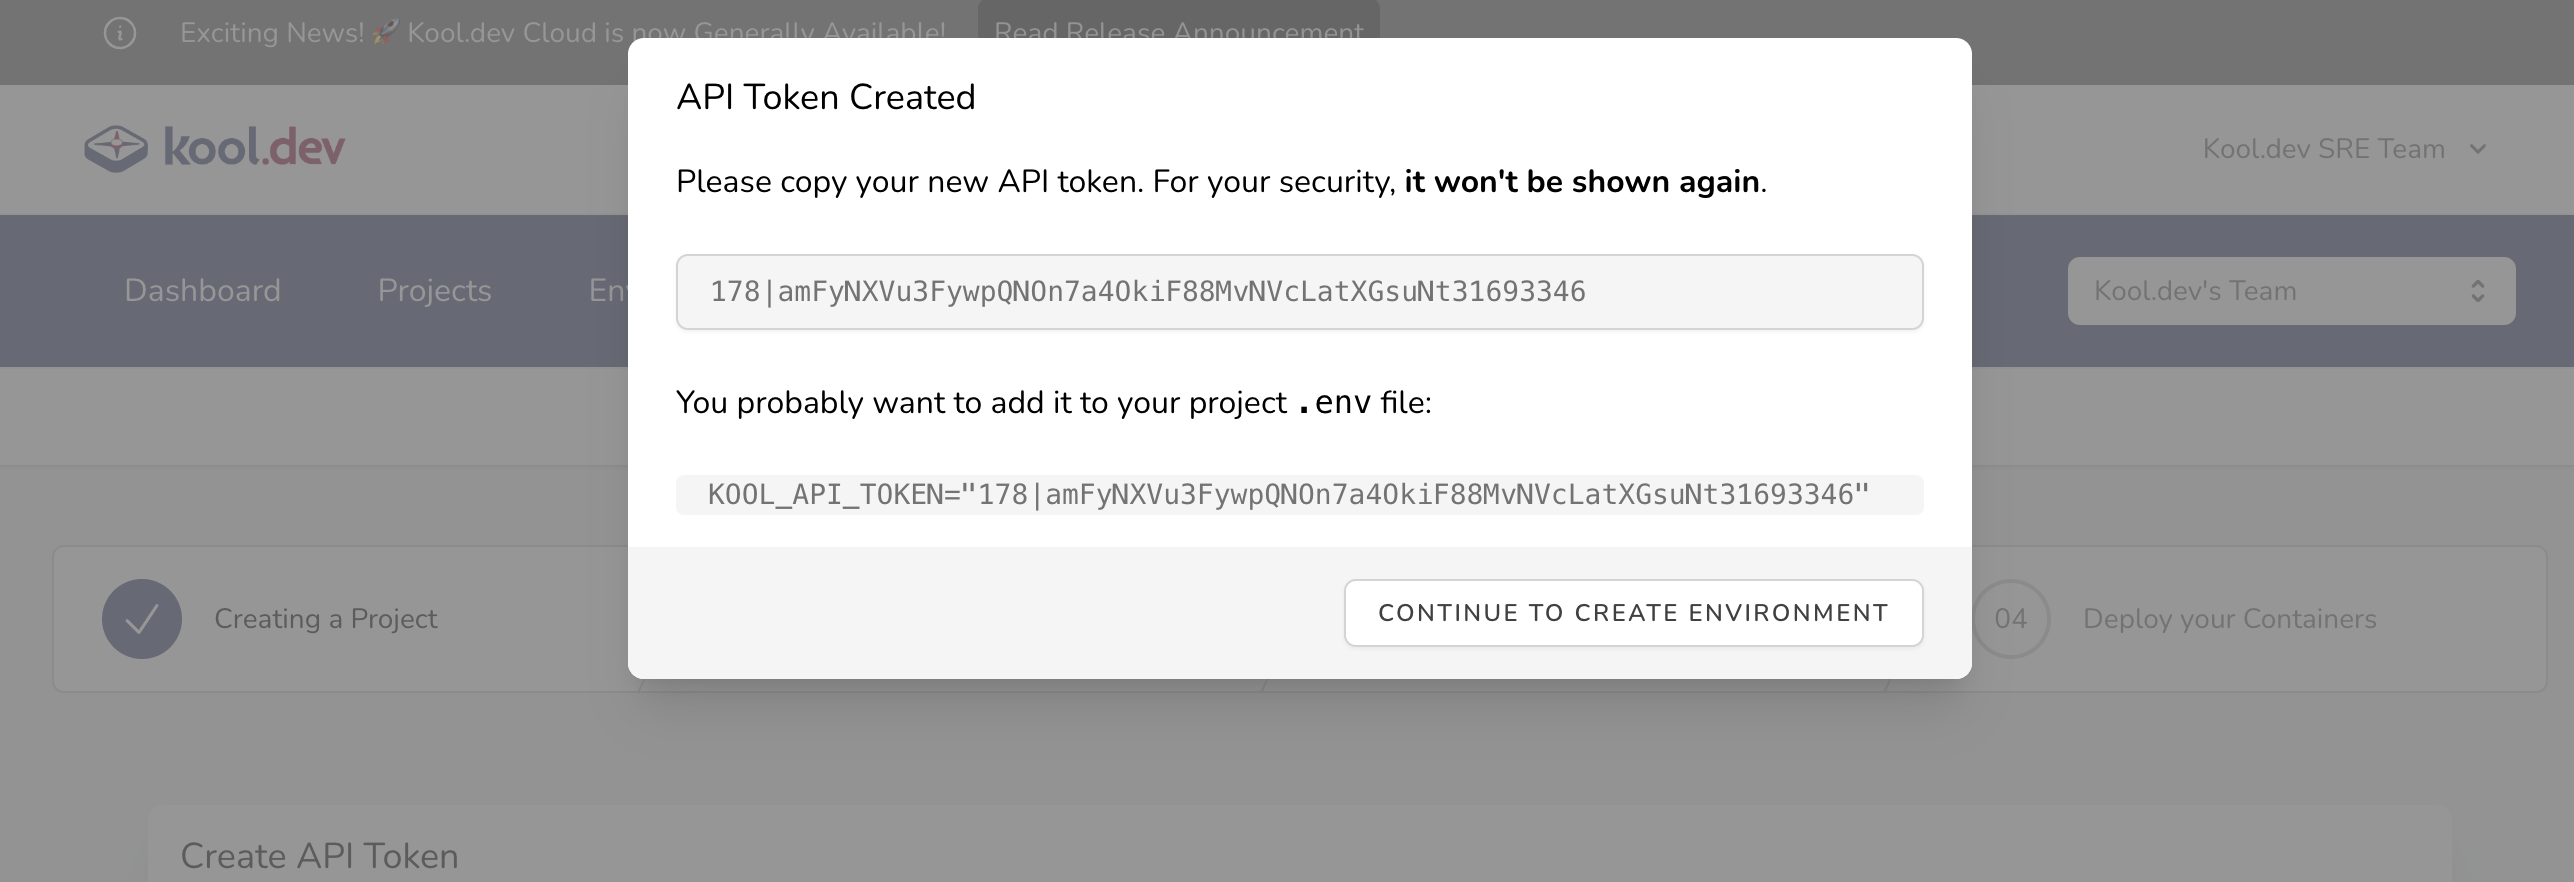
As advised, now you must store your access token in a safe location - you won't be able to see it ever again. In case you delete or lose your access token, you can generate new ones anytime in the Project details page.
¶Creating the Environment
An environment represents a real application that you are going to deploy.
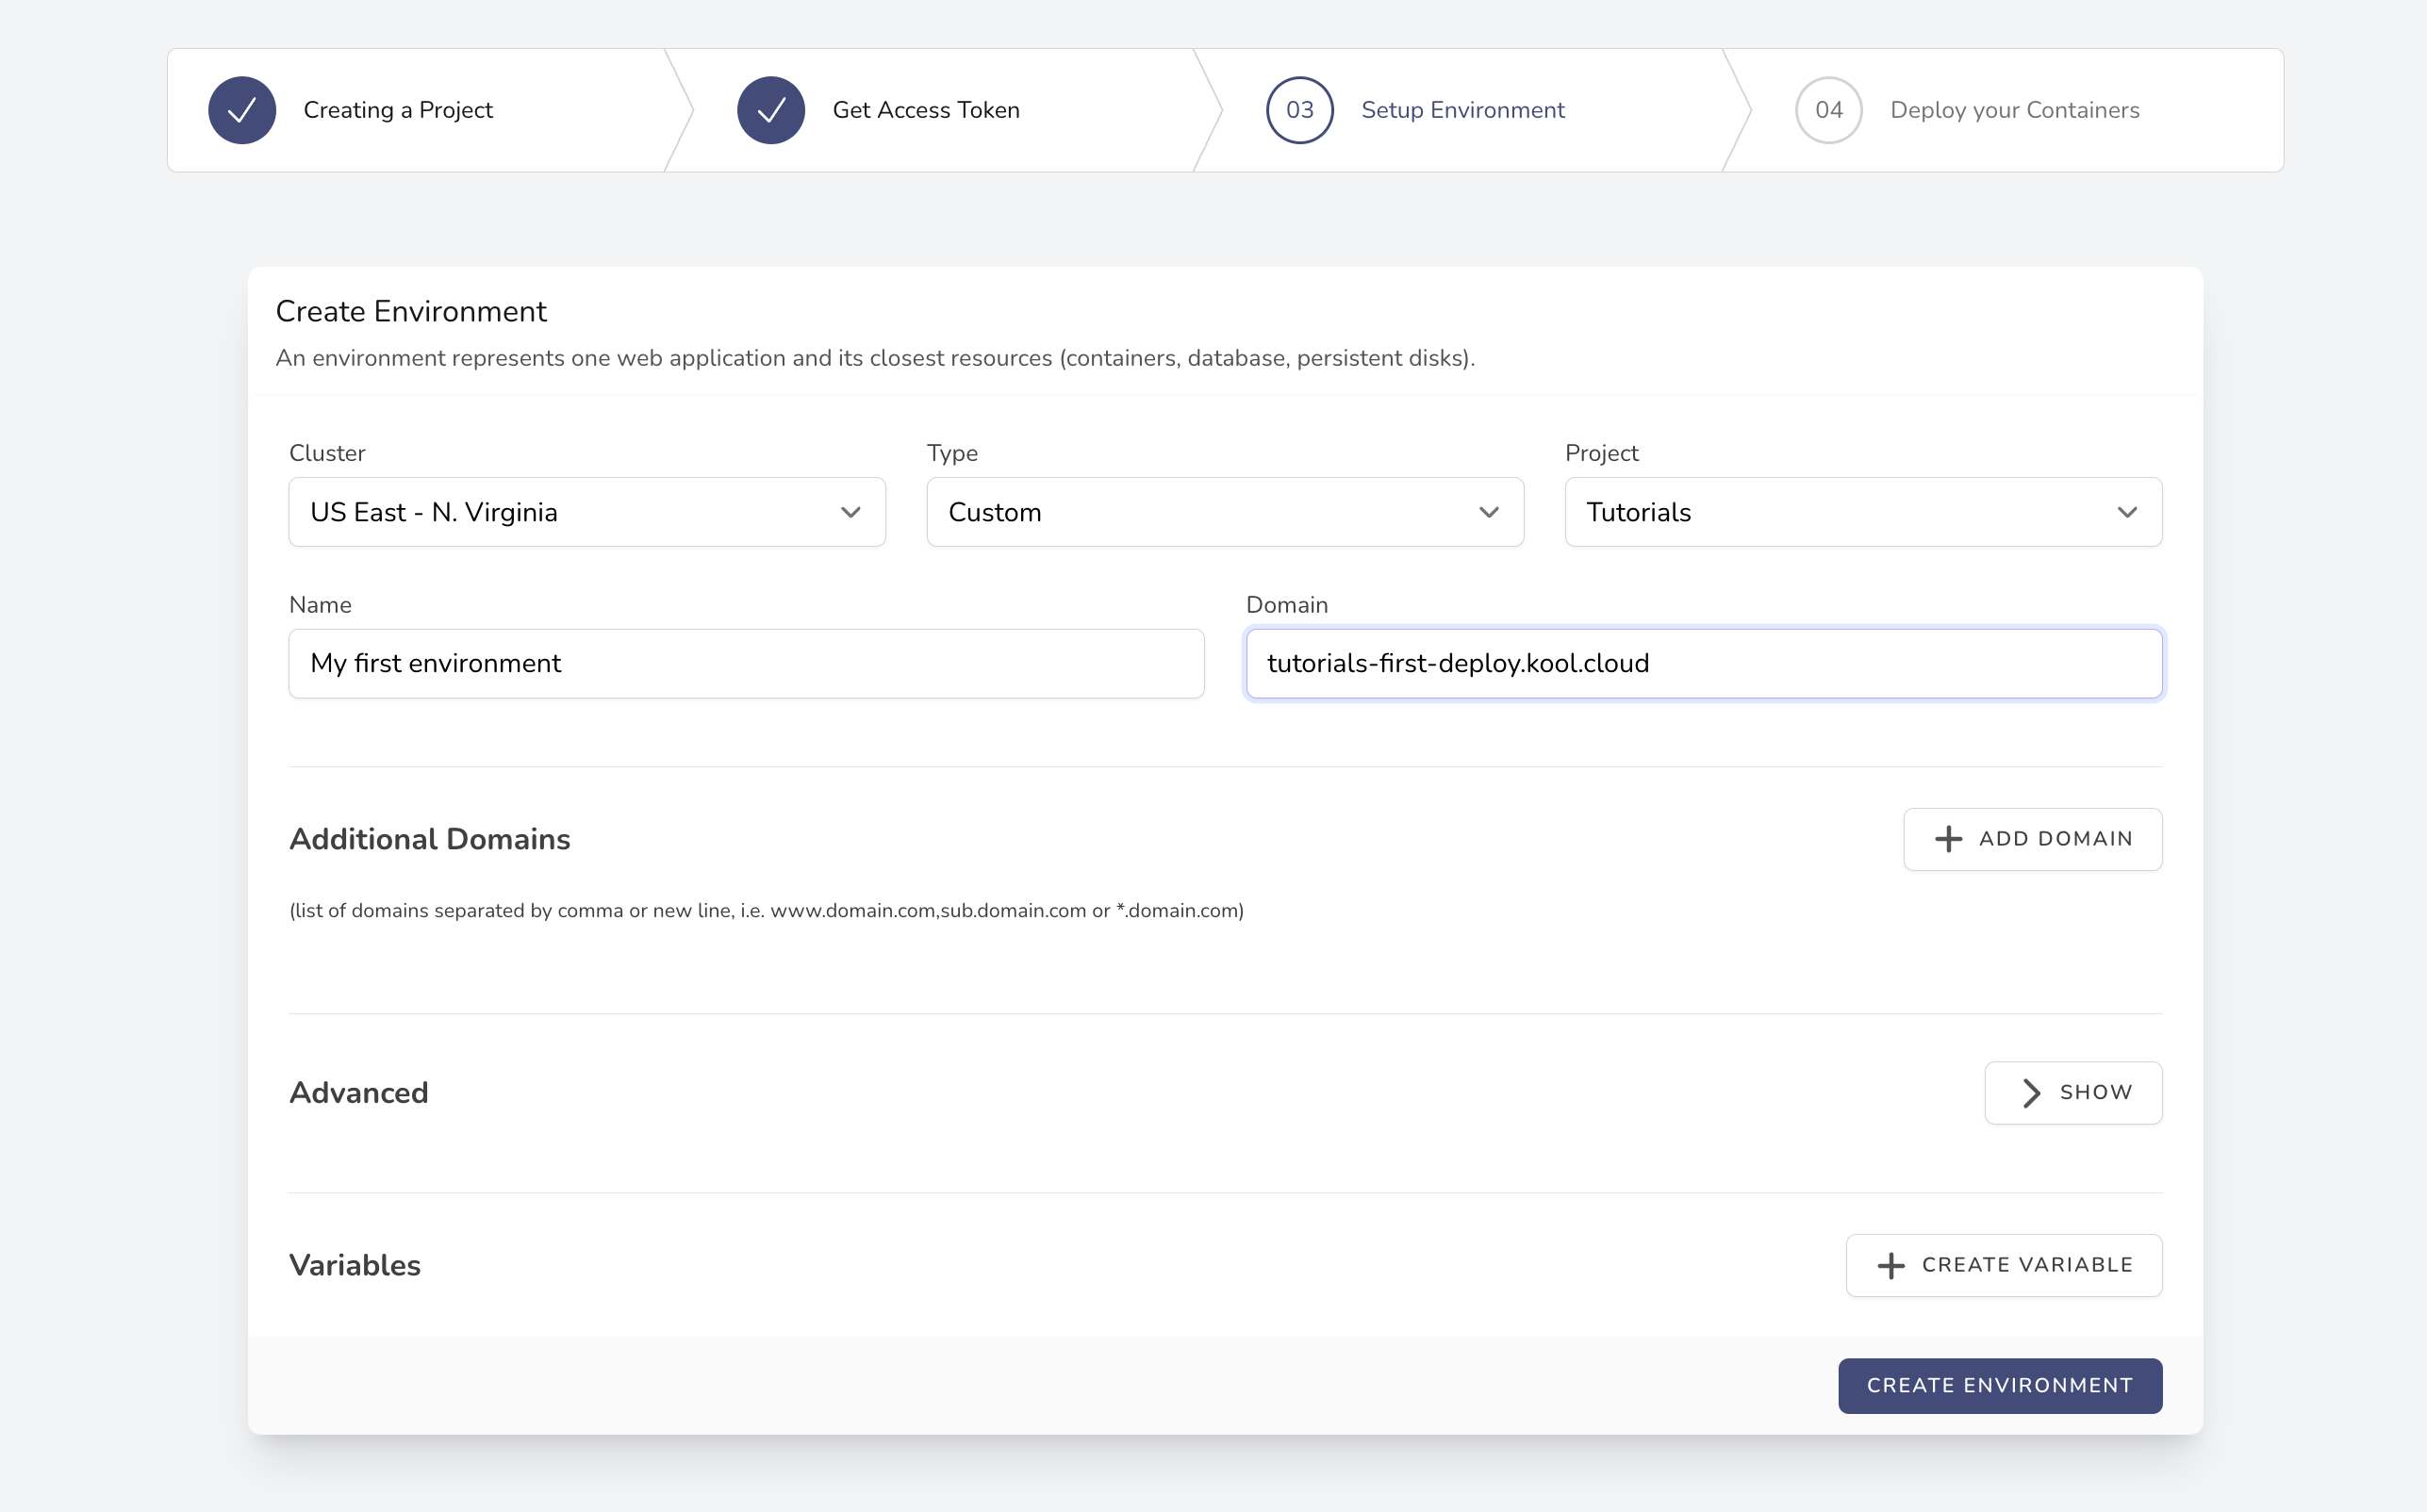
There's already a few interesting options here that you are encouraged to explore and tinker with, but for the purpose of this tutorial we will only worry about the Domain field - that is the domain we want to have our environment responding to.
Tip: by using a *.kool.cloud subdomain you will get instant HTTPS certificates working, very handy for test environments. If you use a custom domain, as you will want to use for production deployments, you will just have to point the domain to the provided Kool.dev Cloud ingress IPs after creating the environment.
¶Deploy your application
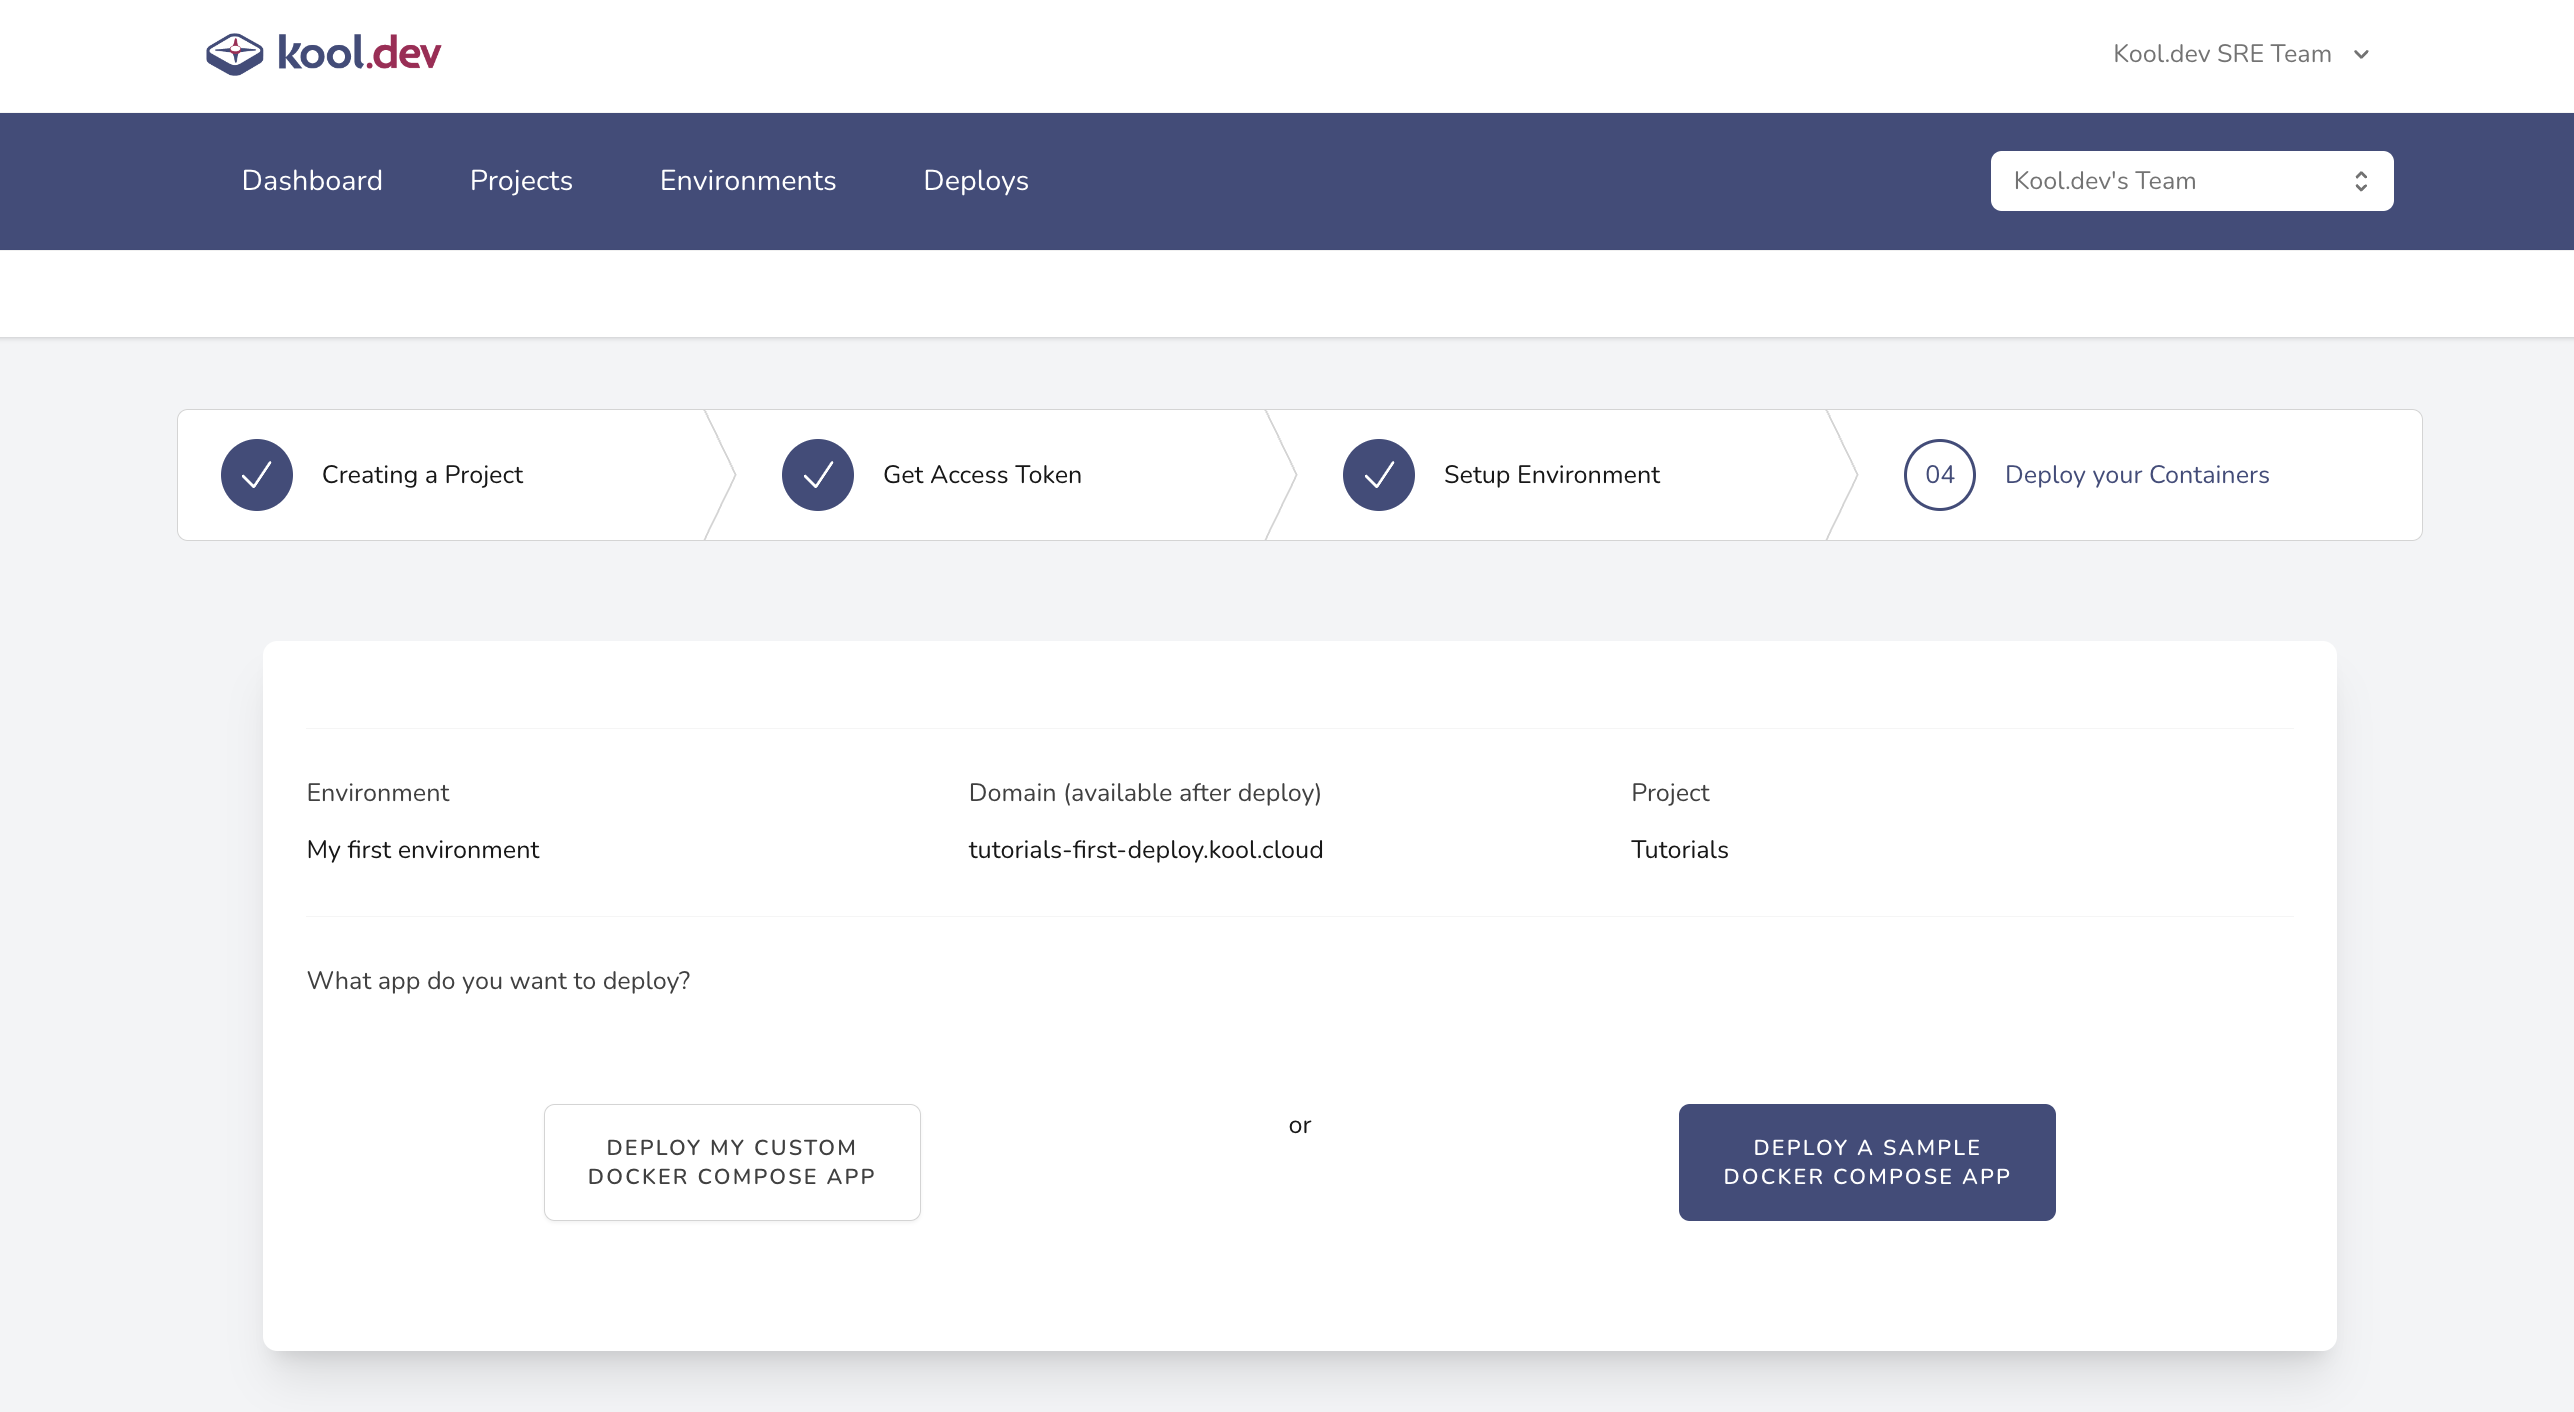
In the last step of the wizard, we focus on our actual application and its and what is required to setup its deployment details. It offers two quick tutorials - either how to deploy any Docker Compose based app, or deploying a quick demo container - we are going with the latter for the purpose of this tutorial.
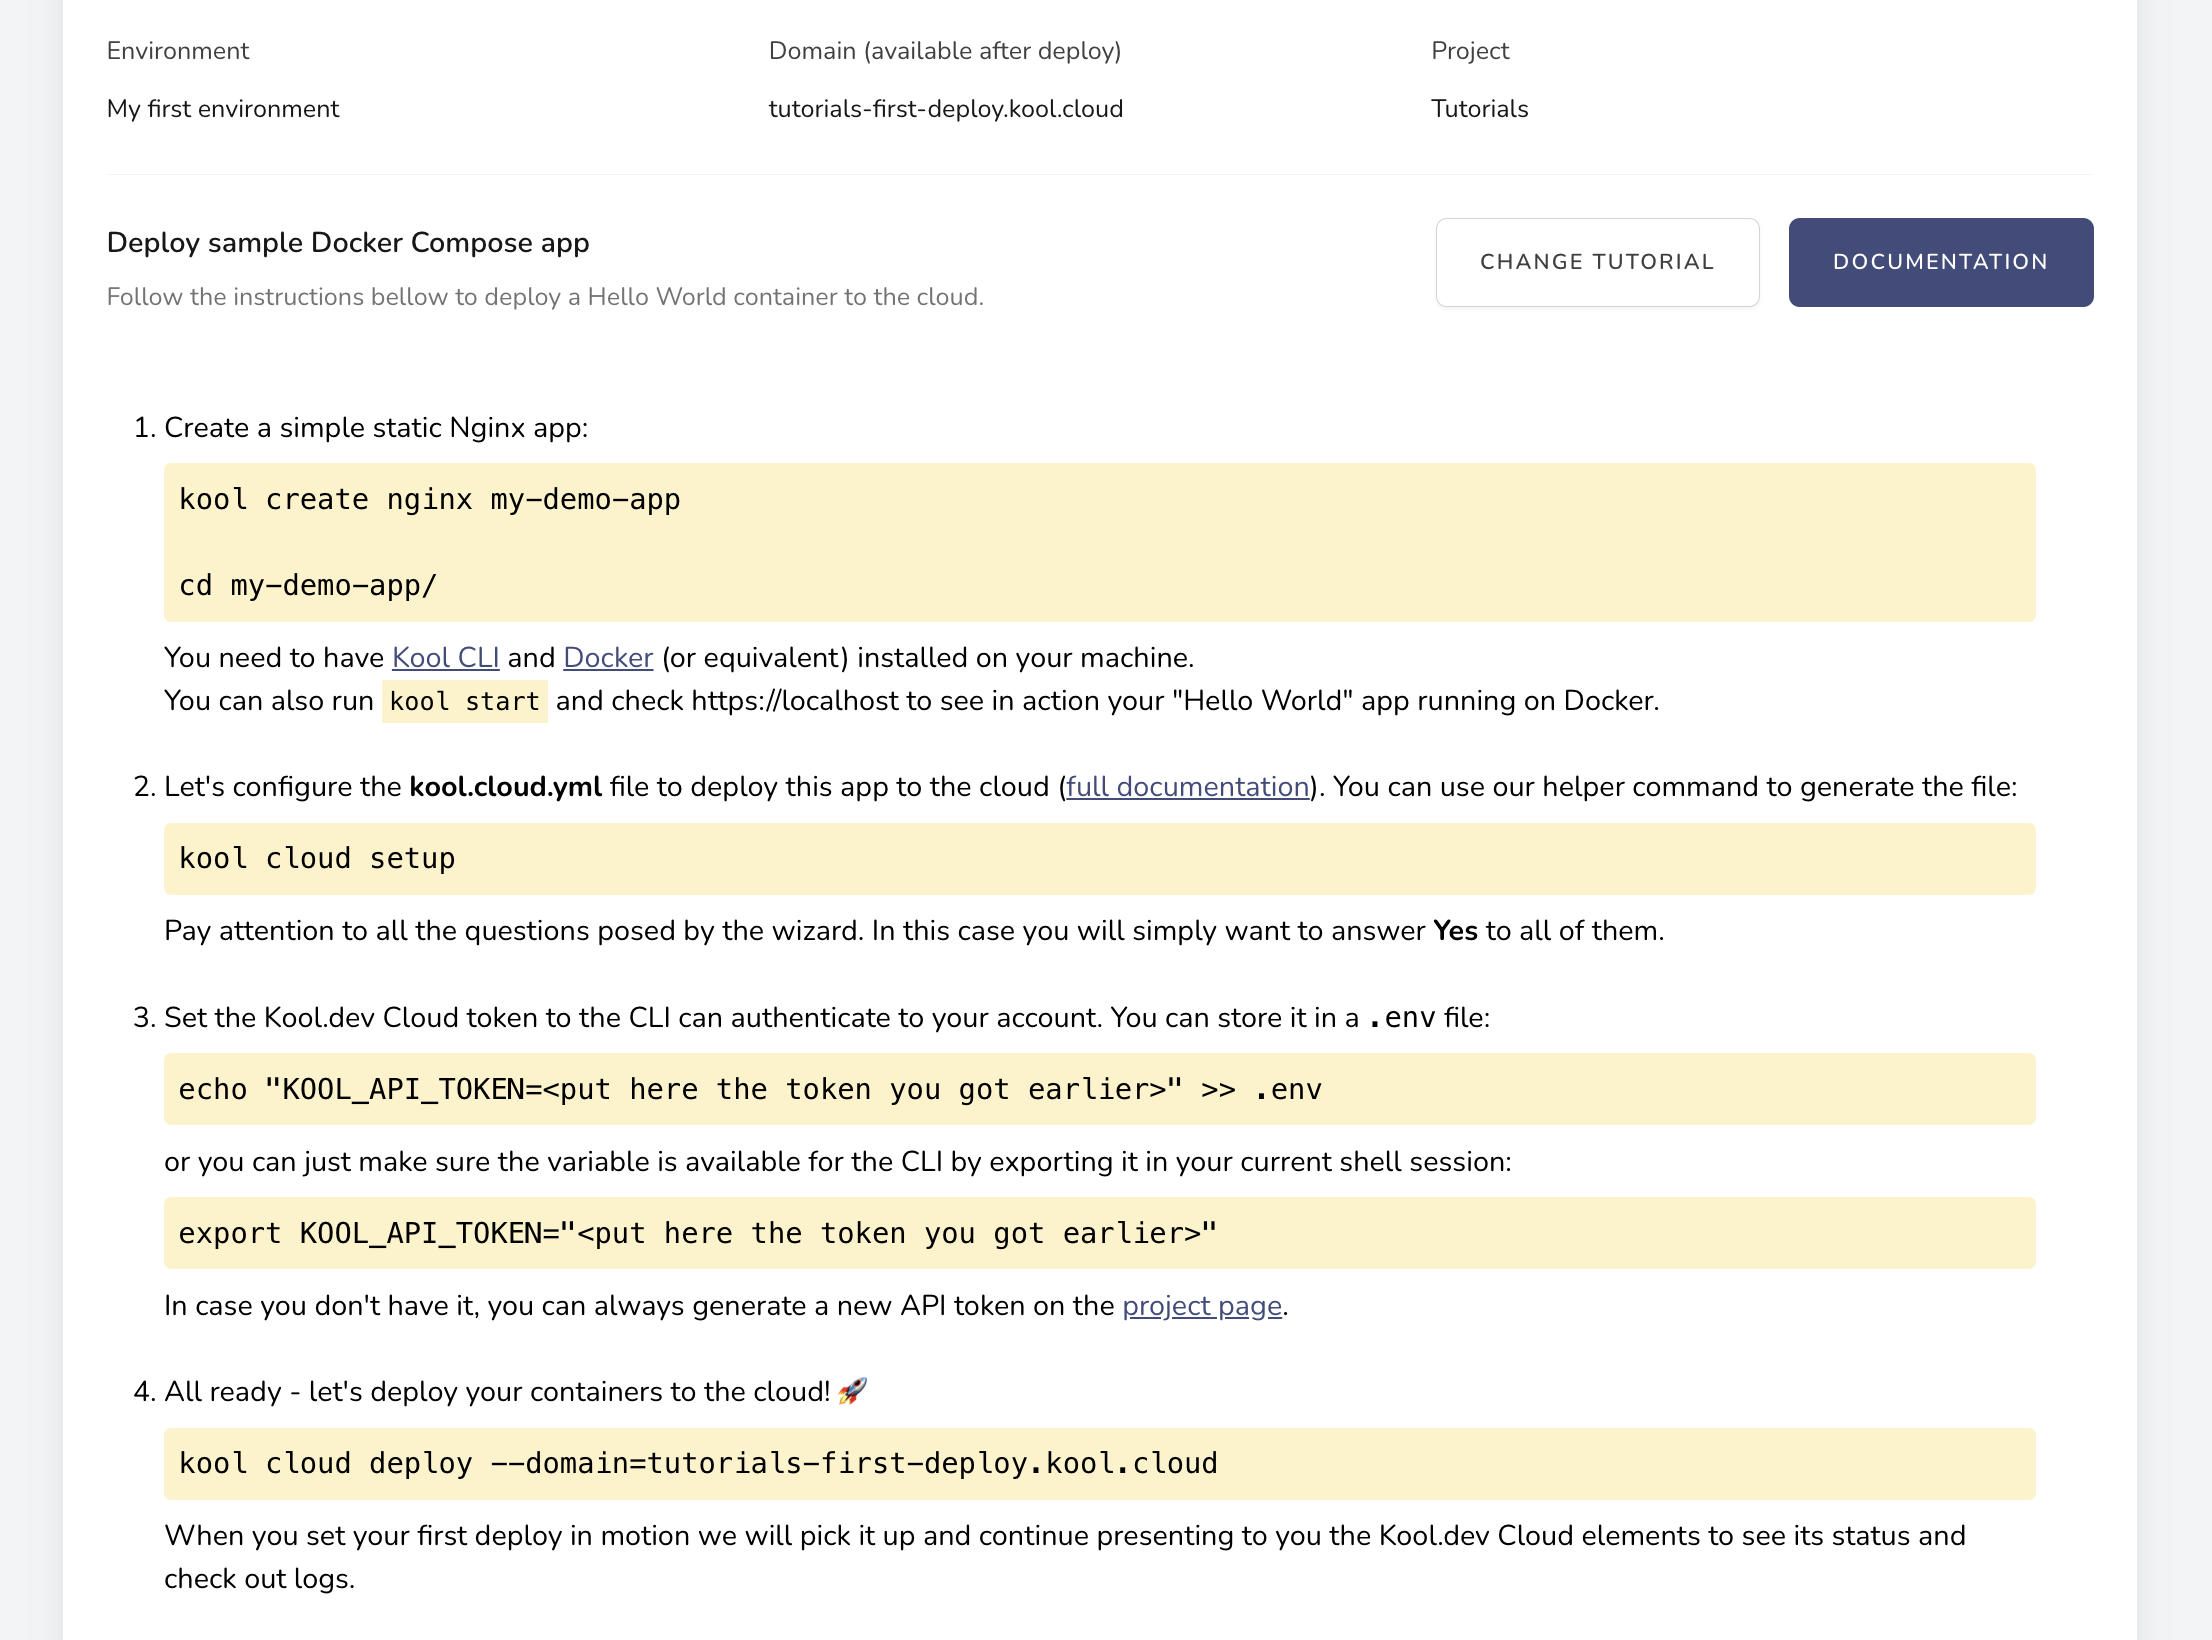
Ensure that you have Kool CLI and Docker (or equivalent) installed on your machine.
- Create a simple static Nginx app:
kool create nginx my-demo-app
cd my-demo-app/
You can also run kool start and visit https://localhost to see your "Hello World" app in action on Docker.
- Configure the
kool.cloud.yml file to deploy this app to the cloud (refer to the full documentation). You can use our helper command to generate the file:
kool cloud setup
Pay attention to all the questions posed by the wizard. In this case, you will simply want to answer "Yes" to all of them.
- Set the Kool.dev Cloud token so that the CLI can authenticate with your account. You can store it in a .env file:
echo "KOOL_API_TOKEN=<put here the token you got earlier>" >> .env
or you can just make sure the variable is available for the CLI by exporting it in your current shell session:
export KOOL_API_TOKEN="<put here the token you got earlier>"
- All set - let's deploy your containers to the cloud! 🚀
kool cloud deploy --domain=tutorials-first-deploy.kool.cloud
When you set your first deploy in motion we will pick it up and continue presenting to you the Kool.dev Cloud elements to see its status and check out logs.
Here is an Asciinema that showcases the steps above:
¶Conclusion & Next Steps
In just a few simple and straightforward steps, we can deploy our local Docker Compose-based containerized app to Kool.dev Cloud. Sign up today and start leveraging it for your apps as well.
Do you have any questions? Feel free to bring them up on any of our official channels:
¶Questions and suggestions
¶Getting help and bug reports
Pro Tip: by starring our main repository on Github you help spread the word and support our growth to continue providing the Developer Experience we deserve.